|
Seashell Shadowbox by Download tubes for shells HERE. Place in PSP tubes folder. This tutorial will give you practice in using the following: Flood fill, Textures, Layers, Canvas Resize, Inner Bevel, Cutout, Drop Shadow, Deformation, Perspective, Selection Tool and Tubes. 1. Begin with a new image - Size 350 X 350 -Transparent background. 2. Flood fill #4C3F22. Change foreground color to #EACBAA. Set foreground Texture to Granite. Flood fill a couple of times to get desired image.
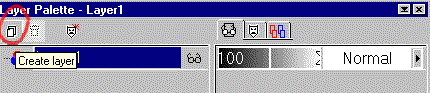
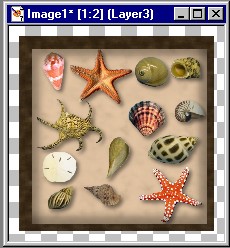
4. Add new layer. (To do this click on Layer Pallette and then icon in top left corner.) Using shell tubes, put shells of your choice onto image. Use new raster layer for each shell so that you can shift them around, resize or rotate them as needed. If you don't want duplications, just undo them as you go.
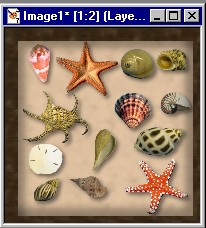
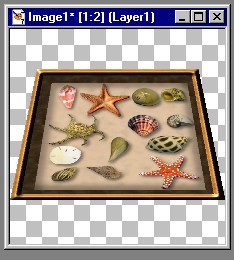
Your picture should be similar to this:
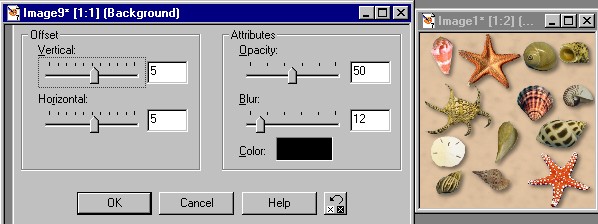
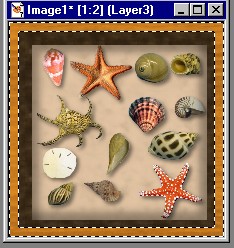
5. Click on Layer Palette. Hide Layer 1 (Just click on glasses and a red "X" should appear). Right click on one of the other layers. Then click on Merge>Merge Visible. To add depth to our image go to Effects>3D Effects>Drop Shadow/. Use the settings shown below.
It's time to Frame our shadow box now. 6. Set background to Null. Go to Image>Canvas Size. Note that current width and height is 350. We want to add 20 pixels on each side - Therefore set New width and height to 390. Highlight Top and enter 25. Highlight Left and enter 25. The Bottom and Right will automatically go to 15
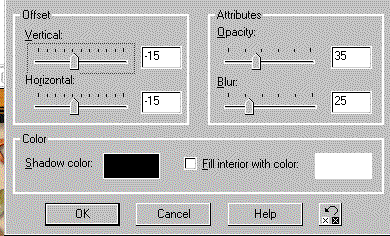
7. Using Magic Wand click on the area outside picture. Add new layer. Flood Fill selection with Black. 8. Invert selection by going to Selections>Invert. 9. Add new layer. Click on Effects>3D Effects>Cutouts and set the settings as follows: (Vertical: -15, Horizontal -15, Opacity 35, Blur 25, Shadow color Black). . 10. Add new layer. Repeat previous step but change Vertical and horizontal.to +15. Your picture should now look like this.
11. Again go to Image>Canvas size. Change the width and height to 430. Check boxes beside Center image horizontally and Center image vertically.
12. With Magic Wand select area outside of image. Add new layer. 13. Set foreground Style to Texture>Stained Wood and flood fill selection.
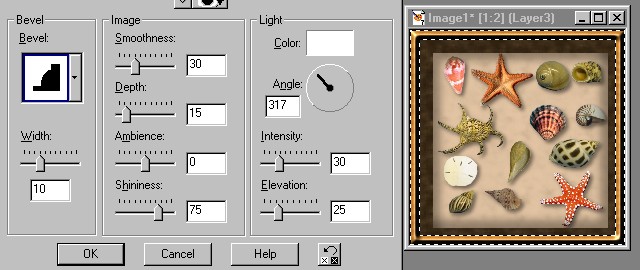
14. Go to Effects>3D Effects>Inner Bevel witn the following settings: Bevel --- Top row - far right selection
Color -- White
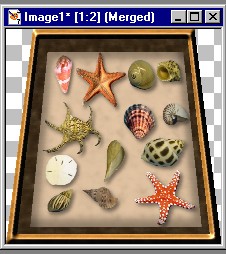
Save your file. If you want to use the same shadowbox later to put other things in, save it in PSP. Otherwise Export as JPEG. Well the shadowbox is finished....let's put it on the table. 15. Go to Effects>Geometric Effects>Perspective-Vertical. Set it on (Minus) -25
16. Use the Deformation Tool. Clicking on the top center node.. Move the top down a little less than 1/4 of the screen. Using the bottom center node, move the bottom up a little less than 1/4 of the screen.. Apply.
17. Since we've laid it down, we should be able to see some of the lower portion of the box. Open a new layer. Using the Selection Tool set on rectangle, draw a long rectangle under the beige portion of the the picture. Flood fill with black. Move this layer to the bottom of layer palette.
18. Let's add the table and we're finished. Using Magic Wand click on areas outside the frame. If you need to, click more than once while holding Shift key down. Set Foreground on Texture> Stained Wood. and flood fill selection. I hope you enjoyed doing the shadow box and will find other uses for it.
Created December16, 2002 |
|